
Halloween Layer Cake Flavor Ideas That Work Every Time
Halloween Layer Cake recipes aren’t just about spooky decor they’re built on deep, rich flavors that make each bite unforgettable. The best base for this dessert? Chocolate. Dark, intense cocoa powder not only adds a bold flavor but also brings a naturally eerie, midnight-black hue that screams Halloween.
In this recipe, we’re using a combination of buttermilk, brewed coffee, and unsweetened cocoa powder. This trio ensures your cake is ultra-moist, deeply flavorful, and has a slightly bitter edge that balances the sweetness of the buttercream. The buttermilk reacts with baking soda to give your layers a beautiful rise, while the coffee intensifies the chocolate flavor without overpowering it.
If you want a twist, swap half the cocoa for pumpkin puree and spices for a pumpkin-chocolate hybrid Halloween Layer Cake. Or add black food coloring to intensify the look without changing the flavor. We’ve tested it all, and these combinations work beautifully.
You can even pair this cake with our slow cooker apple cider for a full fall dessert spread.
Step-by-Step Guide to Baking the Cake Layers
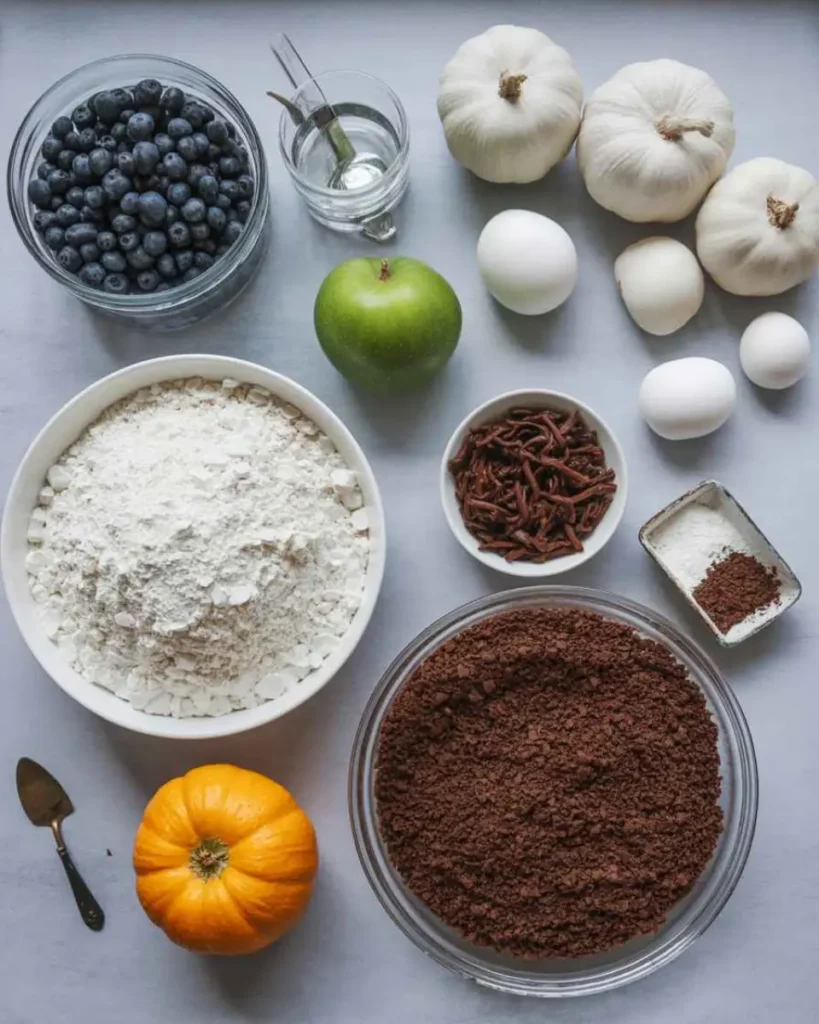
The secret to a perfect Halloween Layer Cake lies in structure. You’ll start by whisking together all dry ingredients: flour, sugar, cocoa powder, baking soda, baking powder, and salt. Then, you’ll combine the wet ingredients eggs, buttermilk, coffee, oil, and vanilla and slowly incorporate them into the dry mix.
Once your batter is smooth (don’t overmix), divide it evenly into three greased 8-inch cake pans. Bake in a preheated 350°F oven for about 30 to 35 minutes, checking with a toothpick if it comes out clean, your layers are done. Let the layers cool fully before you even think about assembling this keeps the buttercream from melting and the structure firm.
Helpful tip: Once the cake layers have cooled, cover them tightly with plastic wrap and chill them in the fridge for 1 to 2 hours to make frosting easier and neater. This makes them easier to handle and reduces crumbs during decorating.
For more layer-cake confidence, check out our baking tips section where we talk all things structure and moisture.
Decorating Your Halloween Layer Cake Like a Pro
Halloween Layer Cake Buttercream That Pops
Print
Halloween Layer Cake Flavors & Baking Secrets for Perfect Layers
- Total Time: 1 hour 5 minutes
- Yield: 12 servings 1x
- Diet: Vegetarian
Description
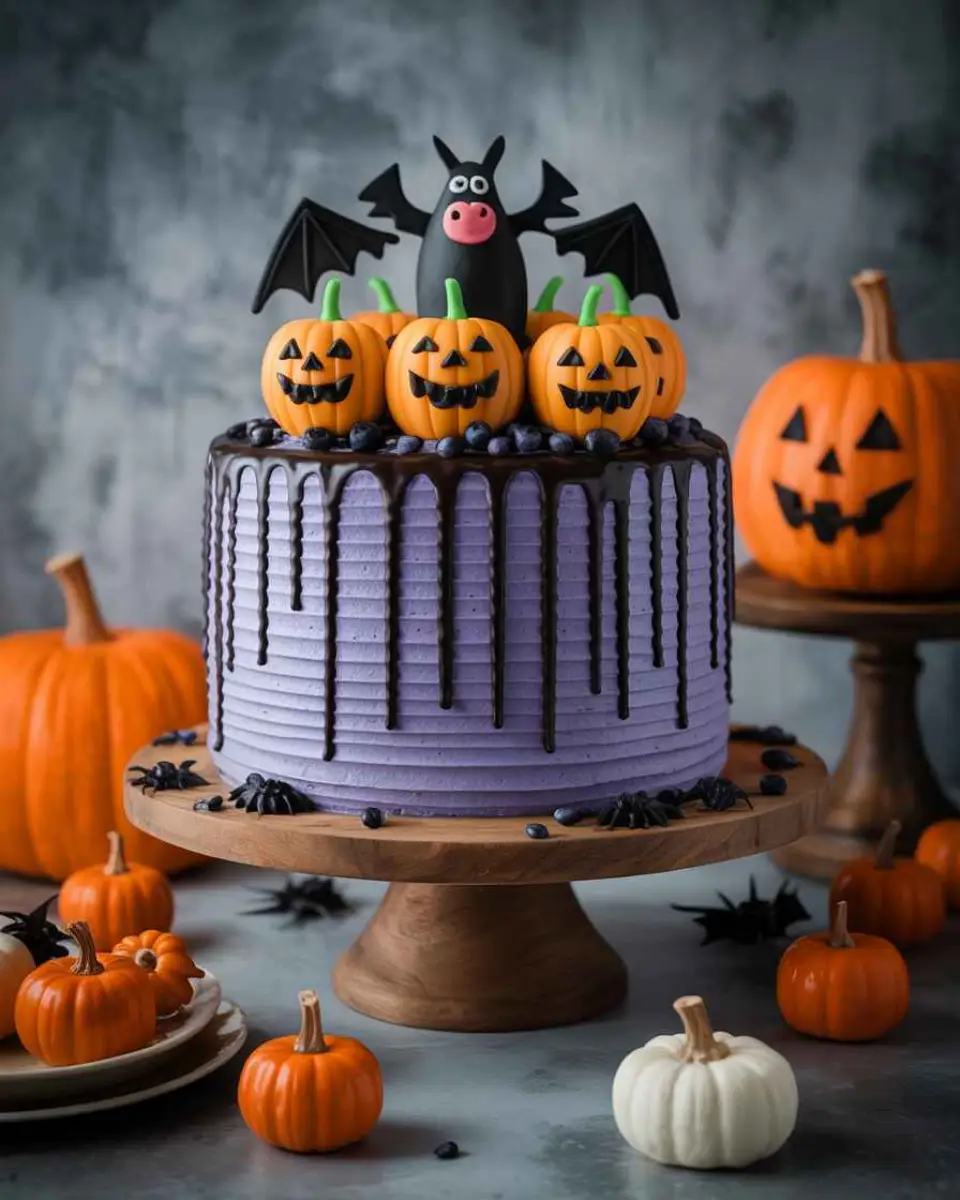
This Halloween Layer Cake features three rich chocolate layers, orange white chocolate buttercream, and a glossy chocolate glaze for the perfect spooky dessert.
Ingredients
- For the cake:
- 3 cups all-purpose flour
- 3 cups sugar
- 1 ½ cups unsweetened cocoa powder
- 1 tbsp baking soda
- 1 ½ tsp baking powder
- 1 ½ tsp salt
- 4 large eggs
- 1 ½ cups buttermilk
- 1 ½ cups brewed coffee
- ½ cup vegetable oil
- 2 tsp vanilla extract
- For the buttercream:
- 9 large egg whites (room temp)
- 2 cups sugar
- 1 lb unsalted butter (soft but cool)
- 1 tbsp vanilla extract
- ¼ tsp salt
- 8 oz white chocolate, melted
- 20 drops orange gel food coloring
- 5 drops red gel food coloring
- 5 drops yellow food coloring
- For the glaze:
- 1 cup heavy cream
- 7 oz bittersweet chocolate chips
- Toppings:
- Haunted House Sprinkle Mix or favorite Halloween candies
Instructions
- Preheat the oven to 350°F and grease three 8-inch cake pans.
- In a large bowl, whisk together flour, sugar, cocoa, baking soda, baking powder, and salt.
- In another bowl, mix eggs, buttermilk, coffee, oil, and vanilla.
- Combine wet and dry ingredients until just smooth.
- Divide batter evenly into pans and bake 30–35 minutes, until a toothpick comes out clean.
- Cool layers completely, then wrap and chill for 1–2 hours.
- For the buttercream: Whip egg whites and sugar over simmering water until warm, then beat until glossy.
- Add butter slowly, then vanilla, salt, melted white chocolate, and gel coloring.
- Frost between and over cake layers, smoothing with an offset spatula.
- Heat cream and pour over chocolate chips; stir until smooth and cool slightly.
- Drizzle glaze over cake, allowing it to drip down sides.
- Top with Halloween sprinkles or decorations of choice.
Notes
- Wrap cake layers tightly if baking ahead and refrigerate up to 2 days.
- Store frosted cake covered in fridge and bring to room temp before serving.
- Prep Time: 30 minutes
- Cook Time: 35 minutes
- Category: Dessert
- Method: Baking
- Cuisine: American
Nutrition
- Serving Size: 1 slice
- Calories: 540
- Sugar: 48g
- Sodium: 210mg
- Fat: 32g
- Saturated Fat: 19g
- Unsaturated Fat: 11g
- Trans Fat: 0g
- Carbohydrates: 60g
- Fiber: 3g
- Protein: 6g
- Cholesterol: 110mg
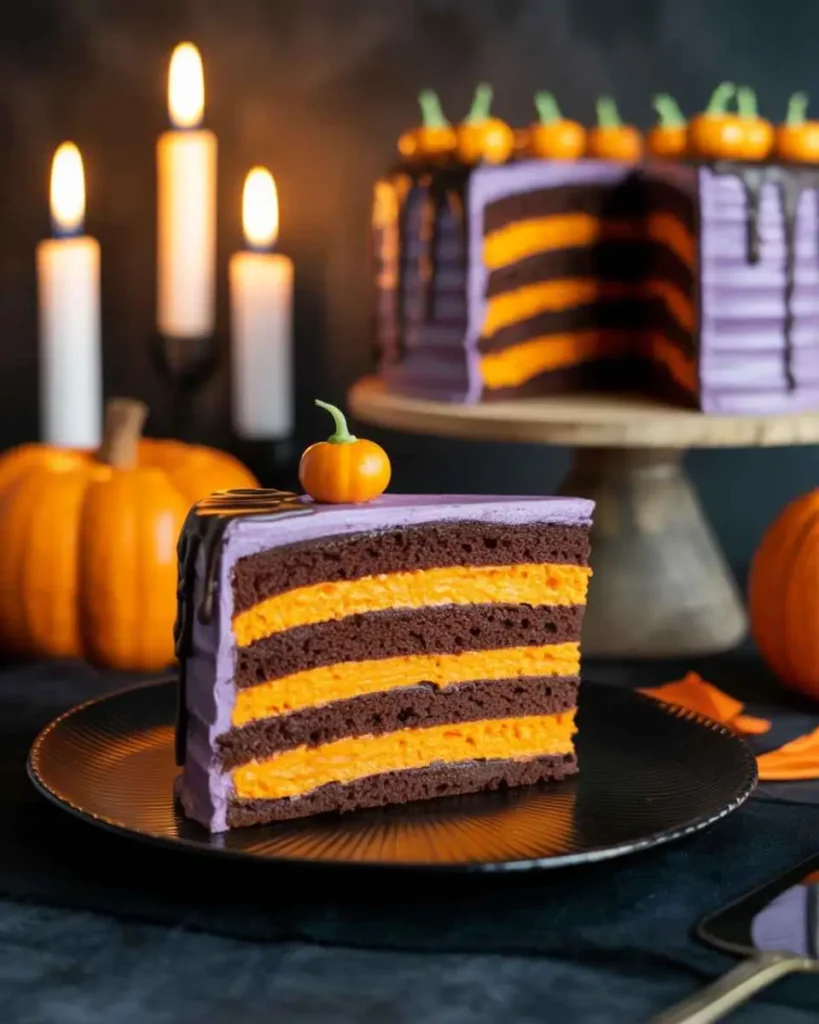
Once your cake layers are fully cooled and leveled, it’s time to bring the Halloween Layer Cake to life with vibrant buttercream. We’re going for an eerie orange hue with subtle ombre effects that scream Halloween without looking too cartoonish.
To make the buttercream, you’ll whip egg whites and sugar until glossy, then slowly beat in cool unsalted butter. Add melted white chocolate for a smooth texture, then finish with your gel food coloring: 20 drops orange, 5 drops red, and 5 drops yellow. This combo creates a warm pumpkin-orange tone that pairs perfectly with dark chocolate layers.
Want to elevate the color story? Add hints of purple or black using separate bowls of frosting. Use an offset spatula to create ghostly swirls or stripes between the layers. If you’re feeling creative, pipe spooky patterns or ghosts right onto the cake. A set of edible eyes or piped spiderwebs gives it extra flair.
Check out our Halloween cupcake ideas if you want to practice piping before working on the cake.
Chocolate Glaze Drip & Toppings for the Ultimate Halloween Look
Now for the best part glazing your Halloween Layer Cake with bittersweet chocolate. In a saucepan, heat heavy cream until just steaming, then pour over chocolate chips. Let it sit for a minute, then stir until glossy and smooth. Cool it just slightly before spooning it over the top of your frosted cake.
Let the glaze drip down naturally for a dramatic haunted-house effect. This part is surprisingly easy, and it hides any frosting imperfections bonus!
To finish, sprinkle on a Haunted House Sprinkle Mix for texture and color. Add mini candy eyeballs, gummy worms, or even small chocolate skulls. If you’re hosting a party, place a Halloween-themed cake topper or a plastic skeleton hand reaching out from the center kids and adults will both love it.
Want even more spooky inspiration? Pair this cake with Halloween bark on the dessert table for a complete themed setup.
Make-Ahead Tips and Storage for Your Halloween Layer Cake
Can You Make a Halloween Layer Cake Ahead of Time? Absolutely.
Yes, you can and honestly, you should. Making a Halloween Layer Cake ahead of time not only saves stress but often improves the flavor and texture. Here’s the best approach:
Start by baking the cake layers up to two days in advance. Once they’re fully cooled, tightly wrap each layer in plastic wrap. You can keep them in the fridge for 2 days or freeze them for up to 2 months. If freezing, be sure to add a layer of aluminum foil over the plastic wrap to prevent freezer burn.
Your buttercream can also be made a day or two ahead. Store it in an airtight container in the fridge, then let it come back to room temperature and rewhip it before frosting. The chocolate glaze should be made fresh for the best drip effect, but it takes just 5 minutes.
Assemble the cake the night before your event for easier slicing and cleaner layers. After decorating, keep your cake chilled in a cake box or container. Let it sit at room temperature for about 30 minutes before serving so the frosting softens to that perfect creamy texture.
Looking for other holiday desserts that benefit from chilling? Try our no-bake pumpkin cheesecake it’s another make-ahead favorite.
Best Ways to Store Halloween Layer Cake Leftovers
If you have leftovers (and that’s a big if), they’ll stay fresh for 4–5 days in the fridge. Place slices in an airtight container or cover the cake with plastic wrap and foil to lock in moisture.
Want to freeze individual slices? Just wrap each piece in plastic and then foil, and freeze for up to 2 months. For best texture, let the cake thaw slowly in the refrigerator overnight.
You can even crumble leftover cake into parfait glasses and layer with whipped cream and crushed Halloween cookies for a fun twist check our dessert hack guide for more ideas like that.
For more recipes Follow me in Facebook and Pinterest
Frequently Asked Questions About Halloween Layer Cake
1. What is a Halloween Layer Cake?
A Halloween Layer Cake is a festive multi-layer dessert created specifically for the spooky season. It typically features three or more stacked cake layers most often chocolate decorated with Halloween-themed colors like orange, purple, black, and green. From candy toppings to ghostly glazes, it’s a visual centerpiece and sweet finale to your Halloween party. This type of cake isn’t just about looks it’s built on rich flavors and dramatic presentation that leaves guests impressed.
2. What flavors work best for a Halloween Layer Cake?
The most popular base flavor for a Halloween Layer Cake is chocolate, thanks to its deep color and bold taste. Using dark cocoa powder adds a dramatic, nearly black crumb that pairs well with colorful frostings. For a twist, some bakers like to blend in pumpkin puree or spice for seasonal flavor. You can also add espresso for richness or incorporate fillings like raspberry jam or salted caramel for contrast.
3. How do you decorate a Halloween Layer Cake?
Decorating a Halloween Layer Cake is where the fun really begins. Start with buttercream tinted with orange, purple, or black gel coloring. Use an offset spatula to smooth the sides or create a textured finish. Add a chocolate ganache drip for drama, then top with Halloween sprinkles, gummy worms, candy eyeballs, or piped spiderwebs. Want a party showstopper? Insert a cake topper shaped like a bat or haunted house to take it up a notch.
4. Can I make a Halloween Layer Cake ahead of time?
Absolutely. You can bake the layers up to two days ahead, wrap them well, and store them in the fridge. The frosting can also be prepared in advance and rewhipped before use. Fully assembled and decorated, your Halloween Layer Cake can chill overnight and still look and taste amazing the next day. Just let it sit at room temperature for 30 minutes before serving to bring out the best texture and flavor.
Conclusion: Your Halloween Layer Cake Showstopper Awaits
A Halloween Layer Cake isn’t just dessert it’s a spooky celebration in every slice. Whether you’re baking for a costume party, classroom treat table, or just for fun with your kids, this layered masterpiece combines rich flavors, hauntingly beautiful design, and just the right touch of Halloween magic.
With deep chocolate layers, vibrant orange buttercream, and a dramatic chocolate glaze, this cake delivers big flavor and visual wow-factor. And the best part? You can prepare it ahead of time, store leftovers easily, and customize it with your favorite spooky candies or decorations.
Don’t be afraid to get creative. Let your imagination run wild because on Halloween, the more dramatic, the better. Now grab your mixing bowls, preheat that oven, and bake your own version of this festive favorite.
Looking for more ideas? Pair this cake with our slow cooker hot chocolate for the coziest Halloween night ever.